Kupergames: Asylum
Tampilkan postingan dengan label Asylum. Tampilkan semua postingan

Selasa, 30 Oktober 2018

Walkthrough Adventure Escape Chapter 6 - Wrath

Walkthrough Adventure Escape Chapter 6 -  Wrath - Android - iOS game - In this chapter, you are in movie player rooms. Like the others, the exit in case of locked. Solve all puzzles are there in this chapter with intelligent.

Walkthrough Adventure Escape Chapter 6 -  Wrath

Walkthrough Adventure Escape Chapter 6 -  Wrath

1. Take the Filmstrip fragments in table and cabinet.
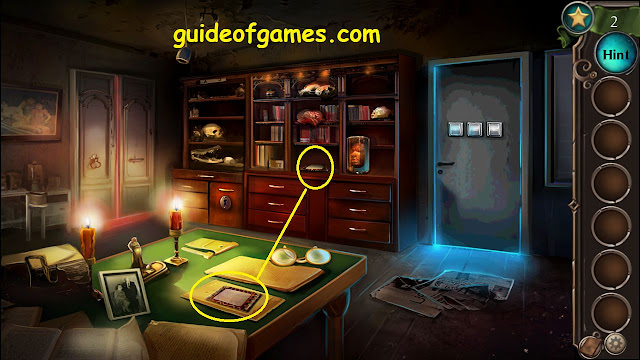
Walkthrough Adventure Escape Chapter 6 -  Wrath


2. Go into the Movie player room. And then, take the Filmstrip fragment.
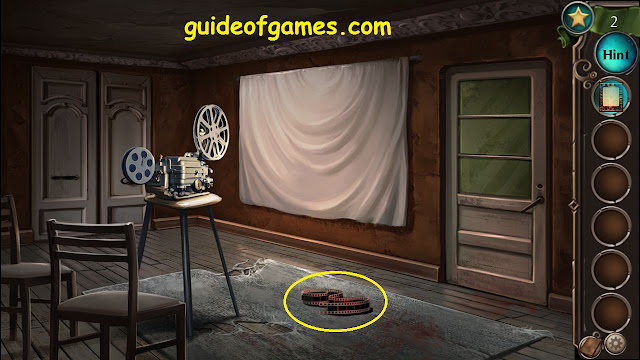
Walkthrough Adventure Escape Chapter 6 -  Wrath


3. Go to the bathroom. Take the list chemical paper in the hand-washing. And then, open the Chemical cabinet that is nearby.


3. At this stage, you must arrange the jar in the correct order. Look at the instructions you already have.
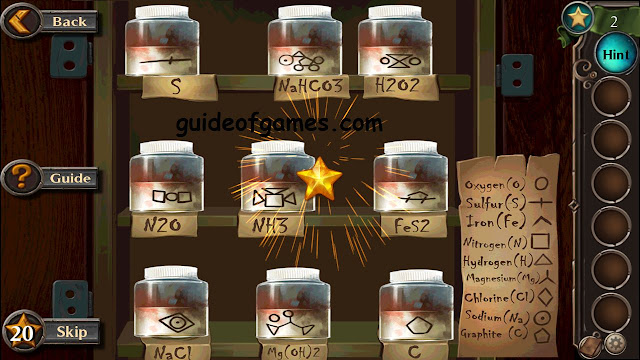
Walkthrough Adventure Escape Chapter 6 -  Wrath


4. Clean the flush toilet with ammonium. Then, take the key inside the flush toilet.

Walkthrough Adventure Escape Chapter 6 -  Wrath


5. Open the safe using the key. Then, arrange files according to the correct date order. You will get the Filmstrip fragment again.

Walkthrough Adventure Escape Chapter 6 -  Wrath


6. Arrange all the Filmstrip fragments correctly. Pay attention to the unique pattern section on the side of the Filmstrips.
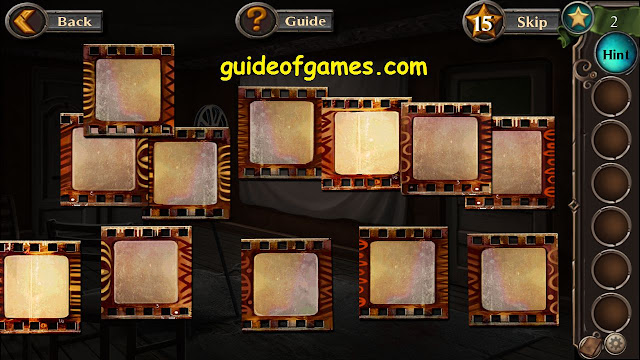
Walkthrough Adventure Escape Chapter 6 -  Wrath


7. Look at the screen! the password appears on the screen (421).

Walkthrough Adventure Escape Chapter 6 -  Wrath


9. Open the door.


Senin, 29 Oktober 2018

Walkthrough Adventure Escape Asylum Chapter 5 - The Mad Scientist

Walkthrough Adventure Escape Asylum Chapter 5 -  The Mad Scientist - Chapter 5 tells the story of ye yourselves to meet the doctor Byers. However, the exit door is locked again.
You have to solve the riddle that is on the wall, get all the clue. And finally, you managed to make the liquid acid to open the door.


Walkthrough Adventure Escape Asylum Chapter 5 -  The Mad Scientist

Walkthrough Adventure Escape Asylum Chapter 5

1. Take matches on the floor. Remember to read the riddle on the wall. That is a clue! Also, look at the paper on the table.
 There is no Alpha and no Omega

Walkthrough Adventure Escape Asylum Chapter 5 -  The Mad Scientist


2. Go to Laboratory. Take the Scissor that is on the table.

Walkthrough Adventure Escape Asylum Chapter 5 -  The Mad Scientist


3. Go to the room that is the bone frame.

4. Take all chemical bottles. Then, torn stomach stuffed using scissors. You will get a key. Remember, look at the wall!

Walkthrough Adventure Escape Asylum Chapter 5 -  The Mad Scientist


5. Go into the hallway. Grab a bottle of chemical that is on the floor. Remember, look at the wall!

Walkthrough Adventure Escape Asylum Chapter 5 -  The Mad Scientist


7. Look at the pictures of the little girl that is on the wall. Calculate all the teeth they have.

8. Open the drawer using the key. You get a clue again!

Walkthrough Adventure Escape Asylum Chapter 5 -  The Mad Scientist


9. Now, you get the password to open the Safe Box.

X = 3
Teeth = 13
Ώ + θ + Σ + α = 0 + 4 +3 + 0 = 7
3

That means the password for open the Safebox is 31373.

Grab the Shovel.

10. Back to the first room. Use the shovel to get a bottle of the chemical.

Walkthrough Adventure Escape Asylum Chapter 5 -  The Mad Scientist


11. Back to the Laboratory. Use matches to light the mechanism.

B42 + T1 = Blue.
K6 + A = Red
S + O.P = Yellow.

Now, you have to make a liquid green chemistry. Blue + Yellow = GREEN.

Walkthrough Adventure Escape Asylum Chapter 5 -  The Mad Scientist


10. Use the Acid to Open the Door.

11. END.

Walkthrough Adventure Escape Asylum Chapter 4 - Dreams and Reality

Walkthrough Adventure Escape Asylum Chapter 4 - Dreams and Reality - Chapter 4 tells about you insisting to the 2nd floor to see a doctor Byers. However, the wooden stairs were damaged.

You assigned are looking for tools and materials to fix it.
Walkthrough Adventure Escape Asylum Chapter 4 - Dreams and Reality


Walkthrough Adventure Escape Asylum Chapter 4

1. Take the Hummer.

Walkthrough Adventure Escape Asylum Chapter 4 - Dreams and Reality


2. Get out of the room. Take the moon piece and wooden plank. Zoom in on the stairs It looks like a clue.

Walkthrough Adventure Escape Asylum Chapter 4 - Dreams and Reality


3. Go back to the room. Look at the table. Place the Roses in the right place. Equate with a clue on the steps of the roses. Grab the moon piece.

Walkthrough Adventure Escape Asylum Chapter 4 - Dreams and Reality


4. Go to the Workshop. Take two wooden planks.

Walkthrough Adventure Escape Asylum Chapter 4 - Dreams and Reality


5. Zoom in on the table. Remove all nails by selecting the same nail. And then, grab all the nails.

Walkthrough Adventure Escape Asylum Chapter 4 - Dreams and Reality


6. Arrange the pieces of the moon on the door. And then, you will get the fourth wooden plank.

Walkthrough Adventure Escape Asylum Chapter 4 - Dreams and Reality


7. Back to Outdoor. Zoom in and repair the stairs using the hammer, nails, and 4 wooden planks.

Walkthrough Adventure Escape Asylum Chapter 4 - Dreams and Reality


8. END.

Walkthrough Adventure Escape Asylum Chapter 3 - The Warning

Walkthrough Adventure Escape Asylum Chapter 3 - The Warning - chapter 3 of the adventure escape asylum game. In order to get out of the room, you must complete the puzzle. Starting with opening the entrance using a magnetic key. Finally you have to use an ax to get out to another room.
Walkthrough Adventure Escape Asylum Chapter 3 - The Warning


Walkthrough Adventure Escape Asylum Chapter 3

1. Use the Magnetic key strip to open the Door.

Walkthrough Adventure Escape Asylum Chapter 3 - The Warning


2.  Take the music set pieces on the floor.

Walkthrough Adventure Escape Asylum Chapter 3 - The Warning


3. Place musical instruments according to color and type. And then, take the Gear.

Walkthrough Adventure Escape Asylum Chapter 3 - The Warning


4. Zoom in to make the special dish. Read the riddle.

Walkthrough Adventure Escape Asylum Chapter 3 - The Warning

Walkthrough Adventure Escape Asylum Chapter 3 - The Warning


5. Give the special menus to old women sitting on the floor. Then she will move from the initial position.

Walkthrough Adventure Escape Asylum Chapter 3 - The Warning


6. Take the music set pieces and a rope.

7. Take a Footstool. Then, place the apple, banana, and garlic in the correct place. If all of that has been moved, then you will see all the music set pieces. Take everything.

Walkthrough Adventure Escape Asylum Chapter 3 - The Warning


8. Arrange the gears and a rope. Then, put the footstool under it.

Walkthrough Adventure Escape Asylum Chapter 3 - The Warning


9. Zoom into the stage. Arrange all the music set pieces that you have found.

Walkthrough Adventure Escape Asylum Chapter 3 - The Warning


10. Go to the Safe Box on the Kitchen. Count each chord. The results will look like this:
  • 3 x A = Turn the key clockwise for 3 bars.
  • 4 x G =  Turn the key counterclockwise for 4 bars.
  • 5 x D = Turn the key clockwise for 5 bars.
  • 2 x E = Turn the key counterclockwise for 2 bars.
  • 2 x F = Turn the key clockwise for 2 bars.

After that, you will get an Ax.

Walkthrough Adventure Escape Asylum Chapter 3 - The Warning


11. Use an Ax to open the Door.

12. END.

Minggu, 28 Oktober 2018

Walkthrough Adventure Escape Asylum Chapter 2 - The Institute

Walkthrough Adventure Escape Asylum Chapter 2 - The Institute - In this chapter, you must be able to leave the institute room. There are lots of clues that will help. Look for it! for example, dog statues, vinyl records, and many more.

Walkthrough Adventure Escape Asylum Chapter 2 - The Institute


Walkthrough Adventure Escape Asylum Chapter 2 - The Institute

1. Take the first dog figurine on the table, and the second dog figurine on the under the stair.

Walkthrough Adventure Escape Asylum Chapter 2 - The Institute


2. Take the third dog figurine on the floors, and the fourth dog figurine on the table.

Walkthrough Adventure Escape Asylum Chapter 2 - The Institute


3. Take the fifth dog figurine in the Drawer.

Walkthrough Adventure Escape Asylum Chapter 2 - The Institute


3. Zoom in on the Poster. Look! you get a clue.

Walkthrough Adventure Escape Asylum Chapter 2 - The Institute


4. Zoom in on the bookcase.

5. Put the dog correctly according to the instructions you get from the poster.

Walkthrough Adventure Escape Asylum Chapter 2 - The Institute


6. Look at  the Leashes. There is a row of numbers that become the password (2 3 6 1 2).

7. Back to the Suitcase. Input the Password. And then, take the Vinyl  Record.

Walkthrough Adventure Escape Asylum Chapter 2 - The Institute


8. You will get the password from Vinyl Record Player on the table (3 1 4).

Walkthrough Adventure Escape Asylum Chapter 2 - The Institute


9. Open the door.

Walkthrough Adventure Escape Asylum Chapter 2 - The Institute


10. Take Magnetic Strip Key from the Nurse.

Walkthrough Adventure Escape Asylum Chapter 2 - The Institute


11. To be Continued.

Walkthrough Adventure Escape Asylum - Awakening

Walkthrough Adventure Escape Asylum - Awakening - by HAIKU Games - The second puzzle game that I played on Android. This game is enough to make me interested. The point to click interaction is really comfortable in the eye.

Let's play!
Walkthrough Adventure Escape Asylum - Awakening

Walkthrough Adventure Escape Asylum - Awakening

This chapter is a tutorial on how to play this game. So, I don't think there will be any difficulties for you. However, some people might need me to explain it again.

So, this is a tutorial from me.

1. Get the Scapel from the table.

Walkthrough Adventure Escape Asylum - Awakening


2. Select the tools you have picked up here.

Walkthrough Adventure Escape Asylum - Awakening


3. Let's cut ourselves free from this bed.

Walkthrough Adventure Escape Asylum - Awakening


4. Open the cabinet to find some more items.

Walkthrough Adventure Escape Asylum - Awakening


5. Get the Gloves.

6. Get the Lockpick Set.

Walkthrough Adventure Escape Asylum - Awakening


7. Zoom in on the paper for a clue.

Walkthrough Adventure Escape Asylum - Awakening


8. Always remember to collect stars to help you when you are stuck.

Walkthrough Adventure Escape Asylum - Awakening


9. Zoom in on the Door. Input the number from a clue on the paper.

Walkthrough Adventure Escape Asylum - Awakening


10. Take a mop. Use the tool to clean the floor so it doesn't get wet.

Walkthrough Adventure Escape Asylum - Awakening


11. Use gloves to remove the cable from the floor.

Walkthrough Adventure Escape Asylum - Awakening


12. Zoom in on the door. Use the lockpick set to open the door.

Walkthrough Adventure Escape Asylum - Awakening


Remember, you will get a star after finishing each chapter.

Anna's Journal

Day 1 - My memories are fuzzy. My doctors tell me to write down whatever I can remember. So, I have started this journal.

Day 3 - I'm in the hospital. They said I'm very sick, but I don't know why. the doctors won't tell me much of anything